Search This Blog

Showing posts with label Stampin' Up. Show all posts

Sunday, 31 March 2013

Hoppy Easter Every Bunny!

Happy Easter everyone - hopefully the start of a beautiful spring in the UK and of course it is autumn in Australia - that always felt weird, but it is still warm and mostly balmy during the days. 
 
A simple card to share with you to wish you all happy easter. 

 
I used the "Every Bunny" set of stamps from Stampin' Up! again this year - they are a really versatile set of stamps and with only one other Easter stamp, you have to make them work for you.  Easter is the shortest time of celebration, so I am determined not to buy any other Easter themed items.
 
I masked off a circle using a punch out and inked around the edge to form the sun.  I coloured the bunny on a separate piece of paper with my Promarkers and extended the flowers being thrown from the balloon basket.  The small eggs were from a different stamp and I scattered them in amongst the bigger eggs.  They were a scrapbooking embellishment from many years ago - the eggs were joined together with green wire so I snapped off the wire with scissors and used them much more simply.  I hacked into a green and pink dotty file folder to form some grass and then stamped the sentiment in the corner. 
 
My family have always sent Easter cards and I now send them to my husband's family as well. 
 
I hope you and yours have a blessed and Happy Easter.  xx


Sunday, 8 April 2012

Happy Easter!

I love Easter time, whether it be here in the UK, or in Australia.  It is one time of the year when the weather can be very similar in either place - the promise of spring in the UK with sometimes the touch of summer, whereas in Brisbane, particularly, there is a gentle and gradual move towards the cooler times of Autumn. 

This has been the dreariest and coldest Easter I can remember!  Normally we get a spot of really hot weather, but I suppose we had it a few weeks ago.  Anyway, the time has been put to good use - cooking for the boys, cleaning, and stashbusting, too. 

My family have always celebrated Easter - I think it is a way of sending love across the miles.  So I got organised a few weeks ago and made up a batch of cards, using freebie papers and some other supplies. 

They are all variations on a theme - but that is the best way of making a batch, isn't it? The card below was for my sister and three year old niece.  It was the first time I'd used my "Stampin' Up!" message stamp, so it took me a few tries to get the lining up right. 


I had the scrap of green lying on my desk, and I stash busted the ribbon.  Its from May Arts, and it's been in my ribbon bag for years. I also used my Stampin' Up! scallop punch - the white was from a left over bit of photo paper.  With the glossy side down, you'd never know!


I'd botched up punching a few daisies, but if you hang them off the card, it really doesn't matter, and looks like you've designed it that way! I love how spring-like the card feels. 


 How to disguise when you don't have enough background paper to cover the whole card.  The matt underneath the green is a scrap of pink vellum.


 The scalloping is a bit skewiff on the above card - funny how when you take a photo of it, the mistake is really magnified!


One sheet of A4 paper goes quite a long way!  The green floral Papertrail patterned paper is so fresh and pretty. It was also fun to stamp the bunny and colour it in with a variety of different colour schemes, using my trusty Promarkers.  I hope everyone is having a lovely Easter. 

Supplies:
The Papertrail Company patterned papers - the Scrapbook Magazine
Easter Bunny stamp - Great Impressions
May Arts ribbon
Scalloped Edge punch - Stampin' Up!
Everybunny stamp set - Stampin' Up!
Xcut 3.2cm Botanical embossing punch
Promarkers

Thursday, 1 September 2011

Little Stars

This is my first layout of the babies.  Part of the Sketch and Scrap challenge on UK Scrappers for August, and here is the sketch:


I turned the sketch on its side to account for my landscape photo.  I just had to scrapbook a photo of the boys - my first layout of them.  Thank goodness my friend Tara had cardstock that matched the suits!  My stock of Bazzill just wasn't bright or vivid enough. 


Journalling reads:
These were the first outfits Daddy bought for you whilst still in hospital.  You were scratching your faces and these baby grows from Mothercare had in built mits. 

I cut up one of the suits and saved the rocket logo and used some of the poppers as a type of brad.  I glued the fabric onto cardstock, and then made sure that after I cut out some of the aliens, I glued around the edge to stop the material from fraying.  The stars were made with a combination of punches and a Quickutz star die.  I still love my Quickutz - so handy to cut out small shapes when you just need one or two. 

I embossed some stars onto the background, and thought that the "little star" journalling block in the Fancy Pants Summer Soiree stamp set was perfect.  I just had to mask off the "s" to make the title suitably plural. 

I didn't have any embroidery thread in the appropriate colour, so I used some fibres.  I am determined to use up my ample stash of fibres some day - even if it takes me years and years! 

Supplies:
Stampin Up!  Cardstock Brights
Bazzill Basics
Basic Grey Lauderdale "Grass Stain/Lau"
Fancy Pants Stamps
White Embossing Powder- "Summer Soiree", and "Fresh Mod"
Uniball Signo White pen

It is my first completed layout for months and months - I had lost confidence and spent ages and ages completing it. Still, I am happy with the result and the subject has given me a renewed interest in getting pages completed fast! 

Sunday, 7 November 2010

Christmas Fayre

Someone commented that I seemed to be in production at the moment!  That is perfectly true, as it happens.  I have been asked to do a Christmas fayre at work, but never having done one before, I have no idea what will sell and what won't. 

To that end, I am making stuff that will otherwise be useful as presents from us!  I have decided to put together packs of cards to sell as I give these as a gift and they do seem to be well received.  People always use up cards they have and I don't think that will ever change. 

So I got to yesterday and put together this pack of 10 cards using left overs from Basic Grey Scarlet's Letter range.  I have always adored this range and really think you don't need to do much to produce a lovely card/paper gift. 


 Here I just added a DCVW self-adhesive ribbon, Doodlebug paper frill, a flower, and an MME embroidered brad.  I restocked my Craftwork Cards messages on QVC's craft day by buying 40 sheets of the messages!  Some are really naff, but I suppose that is bound to happen when you buy in quantity. I also prefer the black and white messages rather than the coloured ones so you are less restricted.  


What I also particularly love about this range is that it is very sophisticated, graphic and also unisex.  You could give almost any of these cards to either a man or woman and I am sure that they would be happy to receive them because of the beautiful paper design. 

To the card above I just added more Doodlebug paper frill, a Mrs Grossman's sticker border strip (I am determined to finish these up very soon!) and a felt flower from Making Memories, with a black card candy on top. 


Not sure about the one above - maybe a bit too severe but it's done now.  I had some white strips of Bazzill cardstock on my desk which I cut down with my Fiskar's scalloped scissors and then altered the colour with a Promarker.  I also bought a job lot of lace from Ebay about a year ago and it came with a thick edging on top.  I nipped that off and covered it with the red border strip. 


The special friend card above is probably my least favourite from the set.  It's a great way to use scraps, but doesn't work so well for me.  Still, it is perfectly acceptable in a pack, I think.  I am not so keen on the message either, but then I am very particular!

This next card is particularly suitable for a man, I think - it reminds me of being in a jungle/ or a rainforest! 


I am so pleased to have bought that Stampin' Up bird and branch punch - it is really versatile, and an elegant profile, I think.  I added a border strip and a sticker border edge for some extra interest - but I think the whole effect is very subtle, unlike some of the other cards!  I love these curvy messages too - there are some really nice sentiments in the pack which could be suitable for loads of occasions. 


You can't get more simple than the one above!  I really don't think it needs anything else. 

I just added a scrap piece of pink to add some softness and contrast to the card below, making it more feminine!  Here is where my circle and scalloped circle punches really come into their own. 


This next card is much more light hearted and flippant - I think it is the shape of the message and the colour in the card that does it!


Second to last one - you get the picture now!  I still think it is amazing how each card can change in flavour, mood and feel - even though you use much the same sorts of embellishments with the same range of paper. 

And finally!  A much lighter card in tone - and I really like it! 

  
Thanks for tuning in.  :)

Saturday, 17 July 2010

Saturday snippets

I enjoy making cards, but sometimes I feel the need to shake things up a bit!  That's where techniques really come in handy. 

This first card was using my alcohol ink technique, but I love to layer up and add movement.  I really like how this card turned out.  I sent it to a friend who is currently going through a hard time and is stuck flat on her back in bed.  I hope it cheered her up a bit. 


The colours are subdued, but they all complement each other into a general richness, I think.  Loads of different bits and bobs on this forest green creation. 

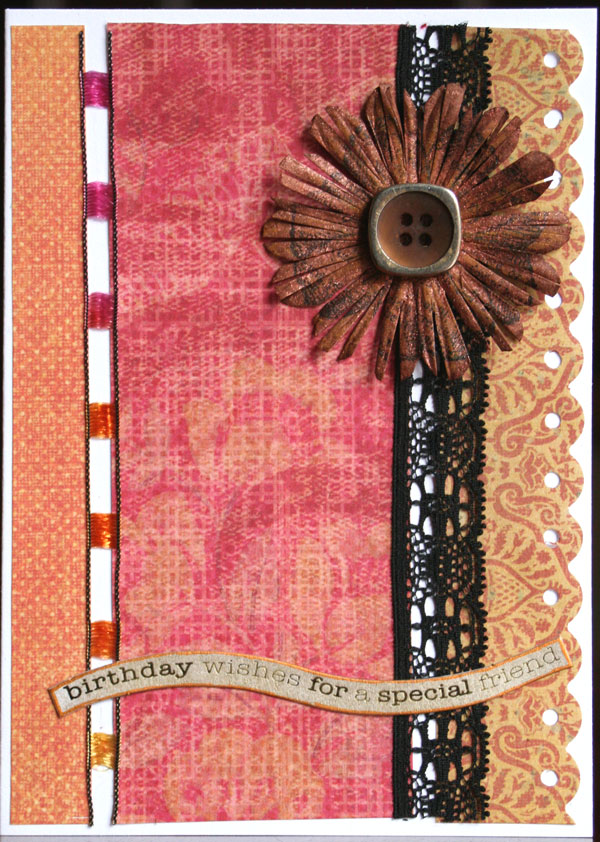
Here's some Indian spice!  I really like how this card turned out and it is one of my latest favourites. 


I've managed to use up some fibres (of which I have SO many).  I stamped on this flower in black Stazon, which was a plain boring dark brown.  I then added some yellow ink, and gave it a spritz with some bronze Perfect pearls mixed with some water.  It has a lovely sheen, which doesn't show up here.  I also cut into the petals and cut away some of the fullness of the flower, which totally changed it's appearance from a daisy into a crocosmia - much more satisfying!  The message was inked in gold, again which doesn't show up well here.  I love the hot spicy tones - delicious and with an exotic flavour!

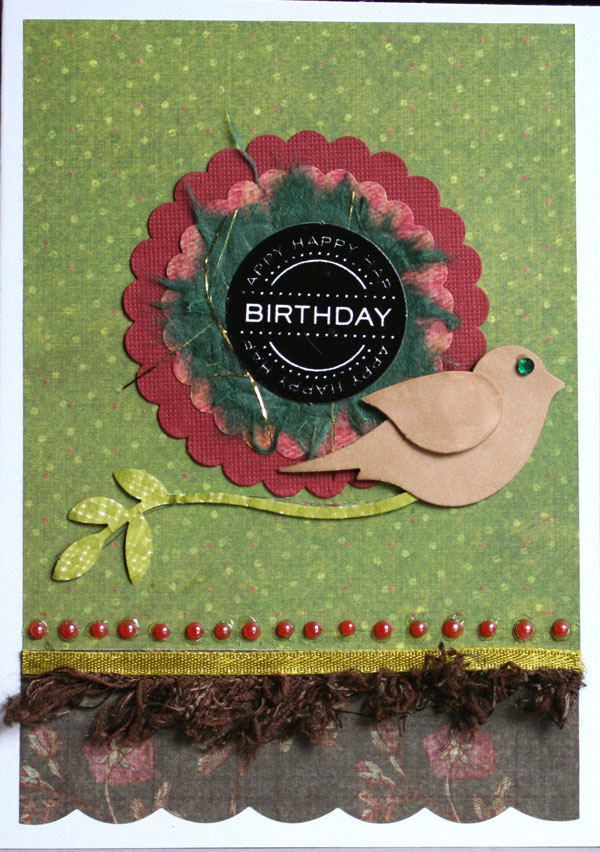
This last card is less unusual, but does use up some handmade paper, and again, some fibres.  I must start using them instead of ribbons - they can add some very interesting texture. 

The addition of the bird instead of a flower means that hopefully it would be suitable for a man, but it is still probably fairly feminine, with all the gem and scallop detail going on, I suppose.  The bird and branch punch is from Stampin' Up - I couldn't resist it, and it has already come in very handy for card making.  I will use in on a page eventually! I punched the figures using white scrap cardstock, and then coloured in the various elements with my Promarkers.  Both the last two cards used K and Co patterned paper which was scrap from the Birthday Book in Thursday's post.  It goes a long way!  I guess this next one is a bit more masculine, being less detailed ....


What do you think?  You can't see it clearly, but there is a dark brown fibre on top of the loopy detail.  It is cute and fluffy IRL ... still suitable for a man?  Yep.  I reckon.  Hmmm, now how else can I use up my stack of fibres in a non-naff way ....