Search This Blog

Monday 5 October 2020

Radiate Positivity

 On Father's Day (6th September) Paul got to choose the outing and the destinations - so he chose to explore our local countryside.  We had a lovely drive through Bauple (pronounced Bopple), Maryborough and Tiaro.  It was a cool, showery day.  

There is the unusual 'Hippie Garage' shop in Tiaro - built in an old Queenslander, there is room after room of hippie wares.  I had never stopped, because I would normally be mid-commute between Hervey Bay and Brisbane.  It is lovely to stop and slow down sometimes, rather than rush-rush everywhere.  


Once again, I had a lovely Saturday morning in my local craft shop, scrapbooking, drinking coffee and chatting.  Bliss! 

These simple layouts are not too challenging and perfect to complete in a couple of hours.  I added Stickles glitter glue to the clouds and the sun when I was at home to give the layout some sparkle.  

Supplies:

Bazzill Basics cardstock - Lemon Zest, Aqua
Patterned Paper -  Paper Loft 'Flip-Flops #FF162 White over Stripes/Sky BlueSolid', Prima Marketing 'Blooming Retro - Cotton Clouds', My Mind's Eye 'Fine and Dandy 'True Blue "Daydream"
Dies - Sizzix 'Sun; Die-namics 'Flat Bottomed Clouds'; Marianne Design 'Rainbow and Clouds'
Stamps - Close to My Heart 'Everyday Magic'
Ink - Versafine Black 
Embellishments - Orange Stickles; Dovecraft 

I am loving this scrapbooking time and hope to do be able to create more regularly. It makes me happy.  

Saturday 26 September 2020

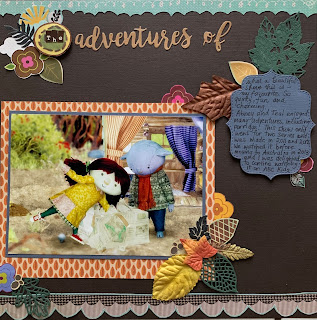
The Adventures of Abney and Teal

 Wow - over a year and a half since I uploaded to my blog.  It is a real testimony of what life does to a person when they are stressed and have to work full time and provide for a family - 

My creative pursuits have really taken a hammering in the recent years. Our local craft store in Hervey Bay has so much potential.  So, now that the new owner has been in a few weeks, she is starting up creative groups where you can come and do your own thing.  

This morning was the first scrapbooking session - and I sat there on my own!  I really didn't mind.  I had good coffee and air-conditioning and was scrapbooking in a craft shop - what is not to love! 

I had a quick think about what I wanted to scrapbook and something that I've wanted as subjects for a long time was the boys' favourite TV programmes as they go through their stages of life.  

Abney and Teal is a thoroughly delightful funny, quirky and charming programme.  I just loved it.  My favourite character was Bop - a walrus type creature who drank a cup of tea in the lake and produced magical bubbles that could carry Abney, Teal and the poc-pocs on a series of adventures over their island.  

I really bought a new printer when I thought my beloved Picturemate died and it is a Canon iP110 - it is so compact and light and really is mobile.  I had to play for a while to ensure that I printed on the proper settings for the appropriate type of photo paper, but I am really happy with the quality of the photos.  


I accidentally printed the second photo on A4 paper - so I thought I would run with it! 

Lots of using snippets of very old patterned paper, which I love and quite a bit of hand cutting.  I am quite particular about ensuring elements used fit in with the theme - here, quirky and charming - hopefully it feels that way too.  

 Supplies:

Bazzill Basics cardstock - Cocoa, Gun Metal, Kraft, Forest Green
Chipboard Alphas and heart - Cosmo Cricket - Dear ABC's  
Alpha Stickers - 'Studio Calico - Classic Calico'
Patterned Paper - Cosmo Cricket 'Mr Campy - Nature Walk'; Prima Marketing 'Blooming Retro - Cotton Clouds', My Mind's Eye 'Fine and Dandy 'True Blue "Daydream"; ki memories Love Elsie  'Forrest Merit Badge'; ki memories 'Bloom';  ' Close to My Heart 'Pathfinding'
Embellishments - Prima Leaves; Papermania Vinyls 
Dies - Prima Marketing 'Leaves'; Echo Park 'Stitched Labels'; Echo Park 'Greetings'

Now am I on a roll?  Dare I say it? 


Saturday 5 January 2019

Female Cards with Patterned Paper

Despite having so many pieces of patterned paper, I can't resist a bargain - so when Craft House NZ and Australia recently announced a major closing sale, I had to buy two Becky Higgins Project Life collections of 12 x 12 patterned paper - I mean, 48 sheets of good quality paper for $10 - that's just over 20 cents per sheet! 

Luckily, I have a card customer who buys 20 birthday cards approximately every five weeks - 10 for men and women apiece. 

So I grabbed one piece of patterned paper to challenge myself and also to get those cards made!  The cards are C6, and also need to be fairly flat to post.  


Obviously, these six cards are all variations on the theme - and there are only so many ways to change that theme!  The background paper is coral and light grey, so I rifle through my stash to see what will coordinate.  Being an on again, off again, Close to My Heart Consultant, I chose the ink colours to match - I used Cranberry, which was redder, and then Sunset, which was more orange.  The grey colour ink was Slate.  

For the first card, I used the doily as a base, then layered on top a stamped doily in Slate, and then on top, I stamped a greeting and punched it out with a circle die so the layering was interesting but subtle.  I then used a Kaisercraft rose leaf and the Leafy Flourish to embellish, cut out of scrap grey cardstock. A large enamel dot coordinated perfectly.  


Greeting stamped in Cranberry.  Doily stamp in Slate.  On top is a silver circle from glitter cardstock - because I wanted to use up the silver wired ribbon, I needed other silver elements to give a cohesive look.  The silver metal circle in the middle of the flower is actually from card and is one of the things I brought with me from the UK - most of my stash is, actually .... and I can't remember the name of them, but I know I purchased them from Card Creations - an amazing manufacturer of cardy stuff in the UK.  The notelet border punch strip on top of the ribbon was in my red scraps bag - you never know when you can use all these bits and pieces!  


The greeting consists of four layers - the doily is the base, on top is a Cranberry circle, on top is a stamped doily in Slate, and then on top is the cranberry greeting in white.  My circle punches sit in a basket on a trolley to the right of my craft table - because they are in reaching distance, I use them often and it cuts down so much time in the making process and really gives a professional finish, I think.  


Variations on a theme from card number two - I used a button in the middle of the flower. Greeting stamped in Cranberry - the greeting layer this time is threefold - the Slate doily, silver glitter circle (1.5 inches), then Cranberry greeting stamped on white and punched out with 1.25 inch circle punch.  The silver wired ribbon was wrapped around the base with DST under the notelet punched border.  


Slate stamped greeting punched out with 1.25 inch circle die.  Layered on Ultimate Crafts 'Invali: Baroque Ornament' die in grey cardstock, then glued onto paper doily. Dienamics 'Leafy Flourish' and Spellbinders 'Blooms Three' flower and stamen.  The stamen was glittered with White Blizzard Nuvo Glitter Drops - I certainly wouldn't recommend these, I think Stickles or Kindy Glitz are much better quality and far less 'gloopy'.  I didn't like the way the glitter turned out as it looked too green in the end - but you live and learn!


Akua Doily Set die cut from grey lustre cardstock - again, the greeting stack is four layers - circle die cut on bottom, glued on top is a coral circle, then a grey card circle and then the Sunset stamped greeting.  I used my postage stamp edge shaped scissors for these two top layers - I find a few of the scissors very effective!  They are one of the first things I bought when I first started crafting, 15+ years ago.  

This card is one of my favourites from this selection: the three flowers link together the circle element (the greeting stack) with the straight element (the ribbon line).  It gives the card a more organic and cohesive feel but I was running out of coordinating flowers! The middle of the flowers were a gem, enamel dot and silver card dot - by mixing up the embellishments, more interest is added to the card.  

I hope this explanation helps those new to card-making and I am very happy to answer any questions.  Happy crafting!


Supplies:
Becky Higgins Project Life 'Coral' Edition patterned paper and coordinating bits from stash
Various Flowers from stash, mostly Prima
Silver wired ribbon
1.25 inch circle punch, 1.5 inch circle punch, Notelet border punch
Paper doilies
Inks:  Slate, Cranberry, Sunset - Close to my Heart
Stamps:  'Decorative Doilies', Inkadinkado; Greetings, Personal Impressions
Dies:  'Leafy Flourish', Dienamics; 'Circles' nesting dies, Sizzix; 'DIY Flora Leaves', Kaisercraft;
'Invali: Baroque Ornament', Ultimate Crafts; 'Akua Doily Set', Couture Creations; 'Blooms Three', Spellbinders
Embellishments:  Enamel Dots (mostly Echo Park), gems (mostly Kaisercraft), White Blizzard Nuvo Glitter Drops
Postage edge shaped scissors

Saturday 22 September 2018

Lovely Daydreamer

Michelle Sheriff had taken these photos of Lewis at Bay Explorers in Urangan just after his fifth birthday, on 11th July 2016.  I took about a week after the boys finished kindy to go and raid Bay Explorer's archives of my boys' photos - rich scrapbooking fodder - the boys had an unbelievable time at this amazing facility.  The staff were just amazing and so full of fun. 

I have been itching to scrapbook these photos ever since I got them, really - and then I actually printed them out some months ago.  So finally the urge could no longer be denied! 


I do really enjoy mixing new and old stash - it kind of justifies the collection of it ..... really? Well, in my mind, lol.  I took advantage of the sale our beautiful local craft shop, Art and Soul Studio, had on its first anniversary.  Yeah! So I bought some Crate Paper 'Wild Heart' collection, together with 7 Dots Studio Word Stickers and a few other bits and bobs.  I actually cut into my newest stash - hurray!

Supplies:
CTMH Burlap, Stamp Set - Sweet and Lovely, Black Ink

Patterned Paper:
Crate Paper - 'Wild Heart' Collection - Paradise, Palms
Stamperia
Simple Stories 'Romance' - You and Me
Glitz Design 2013 'Sunshine in my Soul' - Birds (Base Paper)
Kaisercraft 'Chapter One' - Reflect (Quote)
Various Scraps

Ephemera and Embellishments:
Embroidered Brad - My Mind's Eye
Stamen, Beads, Aqua Stickles, Microbeads
Heidi Swapp Sheer Stickers 'Love'
7 Dots Studio Word Stickers 'Garden Party'
Chipboard - Memory Maze
Prima flowers
Making Memories Washer - 'Believe'

Mixed Media:
Ranger Opague Matte Texture Paste
Paints - Jo Sonja acrylic 'Stillwater', Burnished Copper, Kaisercraft Burnt Umber, Raw Umber
Hero Arts Stencil Pair - 'Sky'

Dies:
Tim Holtz Alterations - Sizzix Thinlets - 'Holiday Greens'
Sizzix Framelits Nesting Dies - 'Stars'

The background paper Glitz Design 'Birds' was a lovely combo of Burnt and Raw Umber - but I have more or less obliterated the background with paint, which is such a shame.  I had to cover up my mistakes - I used the Ranger Opaque Matte Texture paste, sloshed around with ink and paint, to form the clouds on the background, lightly adding some touches of Burnished Copper to make the clouds stand out.  But I botched it when I added in the dark pine green texture paste stars - I ended up painting them mostly out as they didn't come through the stencil cleanly, so I have applied a whole starry background onto a piece of black cardstock, glitter glueing them, then cutting out and sticking onto the layout later.  What a palaver! 


I matted the photos with the Crate Paper 'Paradise' paper - it had enough pattern to be a contrast, but was still soft and muted.  Bay Explorers have a lovely tropical garden in the middle, so I wanted something lush and green to go with this layout.  I didn't want to showcase the cardbox box in the photo too much, so I ended up embellishing over most of it.  I added tiny slivers of patterned paper as contrast, and a softening of the edges between the quote and the photos - that piece of Kaisercraft Chapter One 'Reflect' paper has the most gorgeous quotes all over it, so I just cut out exactly what I needed, to be able to use the rest elsewhere.   

I covered the Making Memories washer with Rose Gold permanent marker and then sealed in the colour with Glossy Accents.  I have a huge tub of metal embellishments bought in 2004 - 2005 - and it will probably take me my lifetime to use them! 

I painted the Memory Maze chipboard with Raw Umber, and then Burnished Copper.  I have used some of the negative waste from the chipboard as embellishment points around the layout to add some impact.  


I think the Aqua Stickles and Microbeads just give a lift and add some light and brightness to the layout.  I had to keep glueing in individual microbeads to satisfy my OCD in terms of placement.   No wonder I hardly scrap like this anymore! 


Annoyingly, my left detail image won't rotate, but it does the job - I have used minute quantities of about six different pieces of patterned paper.  It really does justify the hoarding! I added stamens to one brown flower, and then glued copper beads in the middle of two others.  For my black flowers, I robbed some other flowers of their metallic bead middles as they needed to pop a little.  

So I've dusted off my blog and my multi-media scrapbooking at the same time - let's hope I get the time and inspiration to continue! 

Thanks for visiting today.  :)

Thursday 10 May 2018

100 Day Project .... Days 27 - 29

Day 27


I used a random numbered 4 x 6 Black and White PL card, a Spellbinders travel set for the "adventure" die, and some Hero Arts stamps for the world.  


Day 28 


I was very kindly sent a load of die-cuts of various shapes, and I covered this dream catcher in glitter.  The base card is PL Heidi Swapp "My Favourite Things".  I like this one! 

Day 29 


Again - I used a PL Heidi Swapp "Sparkle" 3 x 4 card with a bunch of different pinks.  Great for a little girl, or a pink loving person! By taking a photo with the light on, but trying to escape camera flare, I have actually captured some of the sparkle of the glitter ....

100 days is a very long haul and I am determined to finish, but it almost certainly won't be by the original finish date.  Sometimes I am feeling quite creative, but to continually use this rectangular shape is pretty restrictive ... oh well! A slight pile of my cards will be used, with a bit more hope that they will eventually fit into their storage box ....

Thanks for stopping by.

#100 Day Project ... Days 22 - 26

It’s been a busy time between commissions and appointments for children ... finally getting a window to upload cards.

Like a Nong, I forgot to take a photo of my Day 22 Project .... a commission for a seven year old girl, so you’ll have to take my word for it.

Day 23 - 25th April ...


Thank you to some very kind crafters on a Facebook group for sending me some supplies when they heard about our family situation.  The pink patterned paper and the die-cut were donations and I die-cut from a pink sparkly card from the Heidi Swapp "Sparkle" kit.   

Day 24 - 26th April - 


Blue glitter cards here and next card also from the Project Life Heidi Swapp designed "Sparkle" range.  I have also used up every last skerrick of paper from the Bo Bunny "Allora" range - it was quite therapeutic to cut all the flowers, leaves and other little bits from the paper.  I love the vibrancy!

Day 25 - 27th April ... 


Quite a busy card and not really my style, but I just used the last bits and pieces of things that I had.  Bright and happy - that's the main thing.  Back soon with more cards - I am having some technical difficulties with updating this blog, due to uploading.  I hope to work it out, eventually!  


Saturday 28 April 2018

Custom Cards - Mother’s Day

A break from the 100# Day Project - for which I am now behind, but hope to catch up. I have been lucky enough to have some card orders - I am proud to say that card sales this year have propelled me over 2/3 of the way for me to have independently paid for the boys’ paediatric appointments of $600. I really only started in March, so that is a great result.

I had a brief of “wine, or art” for a Mother’s Day card.

I came up with this  ....


I downloaded a palette and easel image from the internet. The background was made by scribbling Gelatos onto a canvas background.  When the boys were born, I bought a cheap gessoed pad and stamped their feet images onto it with blue ink, so I am reusing the other side ... waste not, etc! 

My first time using Gelatos ... a bit tricky, considering I used such a textured background, but I liked the result. I used mostly the bright palette with one colour from the Pastel range. 

Once I cut out the image and stamped on the sentiment, I lay the paper on the background and it really needed softening. The flowers on their own were far too harsh too.  I rummaged around 8n my scraps beads and found some ancient slivers of patterned paper ... K and Co for the butterfly and the ladybird, and Basic Grey “Lily Kate”for the paisley flowers and leaves.  It added a touch of whimsy to the card, which was perfect.  Lashings of glitter glue to lift the colour and make it pop! I thought the gold border might do it, but it was flat and unappealing, so the border also got glitter bombed! The customer is pleased ... and I 2as pushed out of my comfort zone to try something new.  Thanks for stopping by. 

Supplies: 
Canvas Pad
Downloaded easel and palette image 
Bright and Pastel Faber- Castell Gelatos
Gold mist and pen
Crystallina Kindyglitz
Close To My Heart “Say it All Occasions” sentiment stamps, Lagoon dye ink, Mini-gems
Prima flowers
Patterned Paper - K and Co, Basic Grey “Lily Kate”